Wednesday, March 6, 2013

4Ground Late Saxon Hovel Review

Today, I built the 4Ground Late Saxon Hovel, which had been given to me as a gift. This is the first 4Ground structure I've ever built, and I am very impressed.

All of the parts came off the "sprue" cleanly with little effort and assembled very easily. I was most impressed by the precision of the subassemblies and how well it all fit together. In total, this build took approximately one hour, during which I paused to photograph each step for this review.


The Kit


All the parts


First I assembled the outer walls per the instructions, then while the glue was still wet (and the walls could be adjusted) I glued the walls to the floor as seen below.


Again, while the glue on the outer walls was setting up, I glued the inner walls into the structure.


At this point, I was pleasantly surprised by how sturdy the model felt.  This is clearly designed to withstand the abuse associated with wargaming and not just a static model for the display case.


I added the window as seen above.  This is the one piece in the entire assembly that had a small defect. The edges of the window are nearly paper thin, and in the one corner of the window insert, the piece separated.  I was able to fix it while gluing it into position, and it didn't affect the look or ease of assembly.


The door assembly and doorframe was next.  I was impressed by how easy the door went together even with the very small pieces.


The fire pit

Next, I glued the door into the frame and the fire pit to the floor.  I chose to assemble the door in the closed position, but tried it both open and closed.  I decided to go with closed to allow for maximum figures to be spaced inside the structure, if the scenario ever came up in a game.


Next was the roof.  Here, I made one minor error; I removed all the parts without checking the lettering.  It was only after I had the four parts out did I realize the two pieces creating the actual roof were slightly different size.  I decided to dry fit everything to make sure I understood the assembly before gluing.  All went well.


The roof before adding the thatch


Okay, here is where I was VERY impressed... the roof section slipped perfectly onto the buildings walls. The fit was just right - nice job 4Ground!


The thatch actually comes in the three pieces needed - no measuring and cutting required.


Above, I used a disposable "acid brush" to spread the glue evenly before applying the thatch.


The roof material has a natural direction to the "thatch," and I made sure to attach it so the thatch was flowing down toward the ground.


I applied glue per the picture in the instructions for the final piece of thatch and then attached it.


Here's the completed 4Ground Late Saxon Hovel.  I will wait at least 24 hours before the next step of flattening the thatch with a 50/50 water/pva mix.

This was an easy build and resulted in a table ready piece in about an hour.  I will be exploring more of the 4Ground structures in the future.  And, a special thanks to my best buddy, John, for giving me this one to build.


Sunday, March 3, 2013

Bolt Action Fallschirmjager

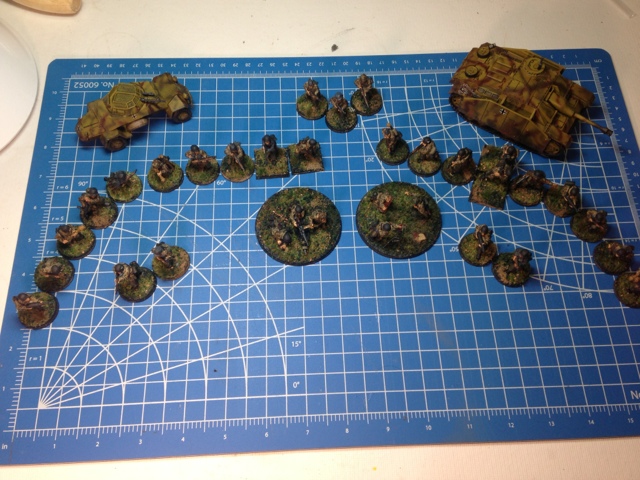
My figures for the Cold Wars tournament are complete. Below are some photos of the 994 point army. Enjoy.


Sunday, February 17, 2013

Sd Kfz 222 Paint Chips and Mud WIP

This is becoming one of my favorite vehicles.  I've added paint chipping and the first of the weathering.  In particular, my weathering focus so far has been on mud and rain streaked dirt.  The rain streaks are most evident on the canvas tire cover.

Paint chips were applied using a small, torn sponge with Vallejo 995 German Grey.  (I'll try to get some better photos of the paint chips, as they don't show up well to the camera.)

Mud is a combination of Citadel's Agrax Earthshade and Stirland Mud.

Enjoy the photo updates.

Warlord Bold Action Sd Kfz 222 in progress

Rain streaking and mud on tire cover.
The tire cover is painted with Vallejo 821 German Camo Beige.  Next, I added a thin layer of Citadel Agrax Earthshade shade.  To create the streaking, I waited until the shade began to thicken as it dried, then pulled the thickening shade vertically toward the bottom of the model with a brush.  This effect requires the right timing for the consistency of the shade color.  I recommend experimenting on some scrap pieces.

Once the shade dried completely, I added some thick mud along the bottom of the wheel cover using Citadel's Stirland Mud.

More mud and paint chips


Gloss coating followed by decals and Mig pigments is next.

Saturday, February 16, 2013

Sd Kfz 222 Update

Here's a couple photos of the Warlord Bolt Action Sd Kfz 222 in progress.


Sunday, February 10, 2013

Bolt Action Puma and 222 WIP

I finished the primer and basic camouflage on the Warlord Puma and Sd. Kfz 222. Tires and detail base colors are next.

The Puma 2 color camo is based on the 2nd Panzer Division, 2nd Reconnaissance Battalion, 4th Reconnaissance Company. Several of their vehicles used only the base Dunkelgelb with green spots.


Saturday, February 9, 2013

Warlord Bolt Action StuG

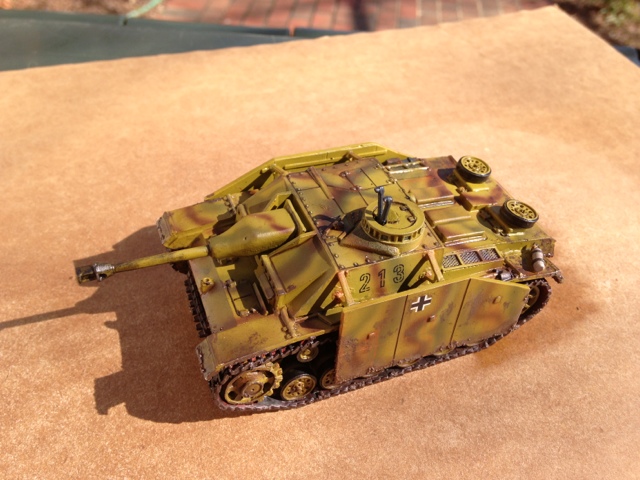
I just sprayed the first coat of lacquer on the Warlord Bolt Action StuG. It's looking okay - maybe I'll do some touch up and more weathering, but I'm pretty happy overall.

I used the Warlord decals for the first time and was impressed by how well they went on and blended to the paint (no silvering).


Friday, February 8, 2013

Holding Figures for Painting

Lately, I've been painting several 28mm WWII figures and wanted to share my method for holding them. This method has worked very well for me; it helps steady the figure and my painting hand for better control.

Using a hand vise to hold the figure, I can position it in any orientation without touching the figure itself. Furthermore, I added kitchen shelf liner material to my workbench. This material has a rubber, non-slip surface which steadies the handle of the vise.

The method works great and has helped improve my results.