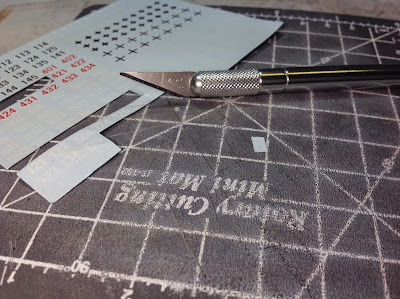
I've had a few requests for a tutorial on applying decals. The following is the technique and materials I use. My guess is there are as many ways to apply decals as there are modelers, but if you're starting from scratch, I can tell you I've enjoyed a good deal of success with the method outlined here.
Before I start, here are a few examples of models with decals that I've applied using this method.
 |
| Helmet Decals on 28 mm figures |
Regardless of the model's texture, I start the decal process the same way - after blocking in the base colors on the model and doing the shading, I gloss coat the area where the decal will be applied. This is a critical step; the gloss coat creates a very smooth surface for the decal to adhere, and it reduces the chance that microscopic bubbles will be caught underneath the decal. The bubbles will cause the decal to "silver" which means it will look a little foggy, floating above the surface, and not appear to be painted onto the model.
While the gloss is drying, I prepare the decal. Cut the decal out with a sharp x-acto blade, staying as close as possible to the decal shape. For some numbers, I cut individual numbers while others are multiple numbers on the same decal. The smaller the decal is, the more careful you need to be to cut close to the decal without slicing through it, for example, helmet emblems or shoulder patches.
I also recommend getting your tools ready. I use a sharply pointed pair of tweezers and small flat brush to handle the decal.
Depending on the weather, you may need to wait overnight for the gloss to completely dry before applying the decals. Once you're ready to start, get some clean, warm tap water. Submerge the decal; I use the tweezers and release the decal at the bottom of the water. Otherwise, they often float and can have poor adhesion.
Using the tweezers, remove the decal after a minute or so and try to keep the paper backing on the decal until it's out of the water. Try to grasp the decal from the sides.
Move the decal with the backing paper to the model and use the flat brush to slide the decal off of the backing paper and into the position you want on the model. If there is too big of a drop of water, the decal will float and be very difficult to place. Touch the corner of a paper towel to the drop, and the water will be absorbed. (Sorry there are no pictures of this - just not enough hands to work with the decal and photograph at the same time.)
Using the flat brush, smooth the decal onto the surface. Notice in the photo below, you can still see the faint outline of the decal. Sometimes, this is difficult to get rid of on a very flat model surface, but keep reading, and you'll see it effectively disappear.
On the other side of the turret, there is a detail on the surface that will not allow the decal to lay flat. This is the same situation you would find with rivets, zimmertt (see the Panther above with the "312" decal). For this, as well as the faint outline in the photo above, I use a decal setting solution. There are a few on the market, but I use Walther's Solvaset.
Add a light coat of Solvaset over the decal and let it sit for 20 to 30 seconds, then you can start to work it into the details of the surface. Use the flat brush and be very gentle. The Solvaset allows the decal to "snuggle" down and conform to surfaces, but it also makes it very susceptible to tearing. Be prepared to tear a few decals as you're learning the process.
In the photo below, you can see how well the decal conformed to the surface.
Once the Solvaset has dried (I usually wait at least an hour to be sure), apply another layer of gloss coat over the decal. This helps to bury the decal and fade any edges down to the model surface. Wait for the gloss coat to dry, and then add a layer of dull coat before any weathering. I've been using Army Painter Anti-shine lately because of the weather - either too cold or too humid for spraying Dullcoat.
Once the Anti-shine is dry, I weather the vehicle using a variety of methods. Just work right over the decal as if it was painted on. That will give you the best effect.
A couple photos of the finished piece are below. Overall, and especially on the tabletop, you cannot tell they are decals.
I hope this helps some of you. Questions and comments are welcome. Good luck.


