
Monday, June 18, 2012
WIP - Nebelwerfer
Thought I share a photo of my nebelwerfers nearing completion. For these, I've been experimenting with MIG pigments, and I'm fairly happy with the results.


Base Markings
While playing Flames of War, especially with my Fallschirmjager company, I was mixing up which stands went with a given platoon.
I experimented with painting different color base borders, adding stripes or other painted identifiers, but I simply didn't like the way it looked. Then, I borrowed (well, stole) a tip from my best buddy. He works with a lot of 28 mm, and to distinguish a commander or special unit from the rest of a platoon, he uses some kind of unique scenery on the base - a flower, shrub, rock...
Using this basic idea, I added specific scenery to each of my FJ platoons - one is a "red" platoon and the other "white." Using miniNature Short Blossom Tufts Summer (Product Code 726-22 S), I added a red blossom to each of the "red" squads and a white blossom to the "white" squads. A third platoon can have no blossoms, if I ever get those painted.
I purchased the blossom tufts through Scenic Express http://www.sceneryexpress.com/prodinfo.asp?number=MN72622S
Some sample photos are below. The first photo didn't quiet capture all the white blossoms like I hoped.
Company command and other independent teams don't have color markings, since they don't belong to any given platoon. Below is one of the FJ observer teams based as an independent team.
Some additional photos of the squads are below.


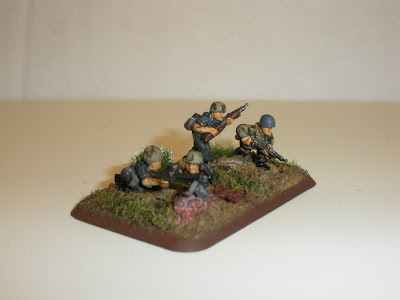


 |
| FJ Command Team |
I experimented with painting different color base borders, adding stripes or other painted identifiers, but I simply didn't like the way it looked. Then, I borrowed (well, stole) a tip from my best buddy. He works with a lot of 28 mm, and to distinguish a commander or special unit from the rest of a platoon, he uses some kind of unique scenery on the base - a flower, shrub, rock...
Using this basic idea, I added specific scenery to each of my FJ platoons - one is a "red" platoon and the other "white." Using miniNature Short Blossom Tufts Summer (Product Code 726-22 S), I added a red blossom to each of the "red" squads and a white blossom to the "white" squads. A third platoon can have no blossoms, if I ever get those painted.
I purchased the blossom tufts through Scenic Express http://www.sceneryexpress.com/prodinfo.asp?number=MN72622S
Some sample photos are below. The first photo didn't quiet capture all the white blossoms like I hoped.
 |
| Command and three squads from both "red" and "white" platoons |
 |
| Command and the complete "red" platoon |
 |
| FJ observers (independent) team |
Some additional photos of the squads are below.

I tend to keep the colored blossoms toward the back of the base, where I can see them from my side of the game table.


Hope this gives some ideas for basing your FoW or other platoon-based figures.
Saturday, May 12, 2012
Lions of Carentan
I recently finished reading Lions of Carentan, Fallschirmjager Regiment 6, 1943 - 1945 written by Volker Griesser.
This may be one of the best collections of personal stories and observations about World War II.

Clearly, it is told from the Fallschirmjager point of view, which can be a little unnerving when a reader from the USA or its WWII allies realizes the word "enemy" used in the book refers to our fathers and grandfathers (my grandfather, included). However, I was often surprised by the moments of humanity shown by both sides of the combatants. The descriptions of the battles and the undertones of the political strife between the Fallschirmjager leadership and Hitler is an amazing story. I recommend this book to anyone interested in the European Theatre during WWII.
For readers of Ambrose, Atkinson, or Reynolds, Lions of Carentan helps to fill-in more details and provides a glimpse into the minds of the Fallschirmjager: a unique group of the German military rarely discussed.
In addition to an intriguing text, the book is filled with many, many photographs. I didn't count them, but I would guess over 100 photos are throughout the book.
This may be one of the best collections of personal stories and observations about World War II.

Clearly, it is told from the Fallschirmjager point of view, which can be a little unnerving when a reader from the USA or its WWII allies realizes the word "enemy" used in the book refers to our fathers and grandfathers (my grandfather, included). However, I was often surprised by the moments of humanity shown by both sides of the combatants. The descriptions of the battles and the undertones of the political strife between the Fallschirmjager leadership and Hitler is an amazing story. I recommend this book to anyone interested in the European Theatre during WWII.
For readers of Ambrose, Atkinson, or Reynolds, Lions of Carentan helps to fill-in more details and provides a glimpse into the minds of the Fallschirmjager: a unique group of the German military rarely discussed.
In addition to an intriguing text, the book is filled with many, many photographs. I didn't count them, but I would guess over 100 photos are throughout the book.
Tuesday, April 24, 2012
More WWII Reference Photos
I'm finally getting around to posting more of the photos taken at the Americans in Wartime Museum open house. This event takes place in Northern Virginia each summer. People from all around the country bring their WWII vehicles, equipment, and uniforms. It's a wealth of information for the modeler, and historical miniatures player.
Enjoy the photos. If you can contribute to or correct the photo captions, feel free to add a comment.
Enjoy the photos. If you can contribute to or correct the photo captions, feel free to add a comment.
 |
| German Motorcycle - BMW R75 |
 |
| German Grenades |
 |
| Sd Kfz 251 (I think this is the Czech version - post WWII) |
 |
| Soviet PT-76 (Post WWII) |
 |
| Russian Tank Model T-34/85 |
 |
| USA Paratrooper Jump Uniform and Gear |
 |
| USA Sherman M4A1 |
 |
| Camouflaged German Hetzer |
 |
| German Fallschirmjager Drop Canister |
Figure Painting - Nail Board
Thought I'd share my method for holding figures while painting. I use a nail board, which is simply a block of wood with holes drilled in it to hold nails. In my case, I'm using a piece of scrap 2 by 4. I experimented with the hole diameter until I was happy the nails could easily slide in and out but couldn't lean from vertical very far.

I use nails that are 3 and 3/4 inches long. This size fits my hands and painting style best, as I'm able to rest the point of the nail in my palm (gently, of course) and then my brush is at the perfect height for painting the figure.
The figures are held by a small ball of "Blue Stik." This is reusable many times, even after primer and paint has gotten on it. In the photo below, you can see the clump of Blue Stik between the nail head and figure.

 |
| Nail board holding 15 mm figures while in process |
Another advantage of using a nail board... I'm able to group the figures that will be based together (in this case, on Flames of War bases). While painting, if I see something I don't like grouped together, I simply move the nails around to find a more suitable mix of figures.

I use nails that are 3 and 3/4 inches long. This size fits my hands and painting style best, as I'm able to rest the point of the nail in my palm (gently, of course) and then my brush is at the perfect height for painting the figure.
The figures are held by a small ball of "Blue Stik." This is reusable many times, even after primer and paint has gotten on it. In the photo below, you can see the clump of Blue Stik between the nail head and figure.

Saturday, April 14, 2012
Barbed Wire Prototype
Here are some photos of the prototype for barbed wire obstacles. These are designed to meet the standard size for Flames of War - 8" X 2" base. The base is made from vinyl floor tile cut to size.
Since these are just concepts, there is no paint on them or basing/flocking material. Comments and suggestions are welcome.
I started with "Floral Wire" purchased at Michael's Arts and Crafts and a 3/8" wooden dowel.
I made two versions. First, I doubled the wire and twisted the two strands of wire around itself to give the barbed wire some thickness and texture. Twisting the two pieces together took time and, of course uses twice as much wire. Using the 3/8" wooden dowel, I wound the wire tightly around the dowel.
Feedback is welcome.
I'll be working up some more complete prototypes shortly and will post photos. After the barbed wire, I plan to do minefields and tank barriers (dragon teeth).
Since these are just concepts, there is no paint on them or basing/flocking material. Comments and suggestions are welcome.
I started with "Floral Wire" purchased at Michael's Arts and Crafts and a 3/8" wooden dowel.
 |
| Floral Wire and Dowel |
I made two versions. First, I doubled the wire and twisted the two strands of wire around itself to give the barbed wire some thickness and texture. Twisting the two pieces together took time and, of course uses twice as much wire. Using the 3/8" wooden dowel, I wound the wire tightly around the dowel.
 |
| Two strands of wire twisted together and wound around dowel. |
At 15 mm scale, I don't know if it's worth going through the extra step shown above and using twice as much wire.
My second attempt used a single strand of wire; this single strand was wound around the same 3/8" dowel.
The results using a single strand can be seen below. This section is mounted to the base, and I've added a couple different versions of posts - the "X" type and straight posts.
 |
| Single wire strand with fence post prototype |
 |
| Another view of the prototype |
Feedback is welcome.
I'll be working up some more complete prototypes shortly and will post photos. After the barbed wire, I plan to do minefields and tank barriers (dragon teeth).
Thursday, April 5, 2012
Fallshirmjager Squad
I finished up the last squad of 15 mm Battlefront Fallshirmjager for my FoW platoon. These were primed gray, painted with Vallejo acrylics, gloss coated using GW's brush on gloss varnish, "washed" with black magic wash overall with brown applied to face and hands, and then sprayed with Testors Dullcoat.
I'm fairly happy with the results, and I'm sure they'll look better once they are grouped into teams and based properly. A couple photos for your comments...


I'm fairly happy with the results, and I'm sure they'll look better once they are grouped into teams and based properly. A couple photos for your comments...


Subscribe to:
Posts (Atom)